Firmware for newer 6TDs and CD24s
This firmware is also applicable to 3ESPCDs with integrated CD24
digitisers.
The latest version of the CD24/6TD firmware is available below.
this firmware should only be used when upgrading a CD24, 6TD,
or 3ESPCD that has firmware version 2xx or above. If you are upgrading from
version 1xx, please instead refer to
firmware for older 6TDs.
To find out what firmware version you are currently using, right-click on
the digitiser’s icon
( - not the Local or the
Comxx icons)
in Scream!’s main window and select
from the pop-up menu. This will open the
Configuration setup window. The version number is
given in the Software revision box.
Download
the latest CD24 firmware, an 89k .zip file containing:
Earlier versions
Earlier versions of the CD24 firmware, for testing or reference, may be
downloaded from: the CD24 download directory.
Units that will not upgrade
Some units have an incompatible boot-loader that will not accept the new
firmware. Attempting to flash the latest file will not damage your
unit. However, the upgrade will not succeed and the firmware will revert to an
earlier version.
Should this affect your unit, please email
for further instructions and the compatible firmware release.
Upgrading units with Ethernet from before version 279
The Ethernet enable flag has moved in CMOS so when upgrading the firmware,
Ethernet is inadvertently switched off. This is an issue if upgrading firmware
on remote units over a network connection. To upgrade units from v.278
and earlier, this work around must be used. Open a terminal and
enter:
OK-1
64 ENABLE
Now load the new code as normal. When complete connect to the sensor again
and open a terminal to enter:
OK-1
16 DISABLE
After upgrading...
Upgrades from some early firmware versions can interfere with the setting of
the high-pass filter. To check, right-click on the digitiser's icon (not
the Local or the
Comxx icons) in Scream!’s
main window and select from the context menu.
This will open Scream's Configure dialogue: Select
the tab. There should be a drop-down
menu to configure the high-pass filter but, in some cases, the menu will be
missing, as shown here:
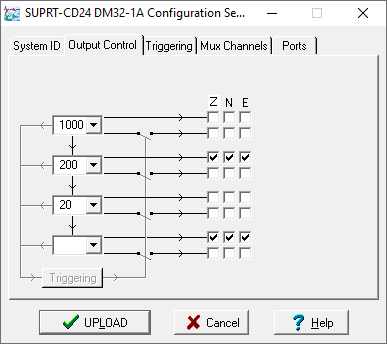
If this is the case, open a terminal to the digitiser by right-clicking on
its icon in the source tree and selecting
from the context menu. In the resulting window, type the commands
0 HIGHPASS
GO
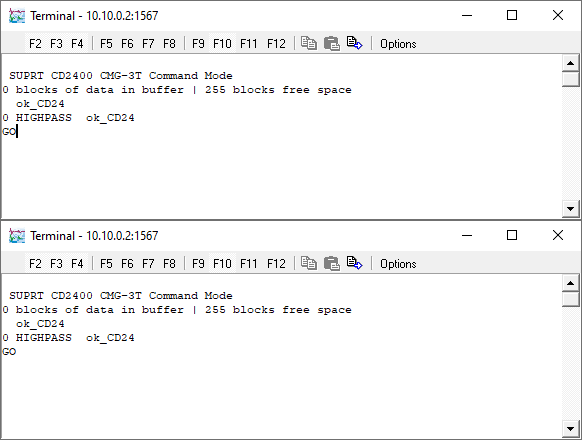
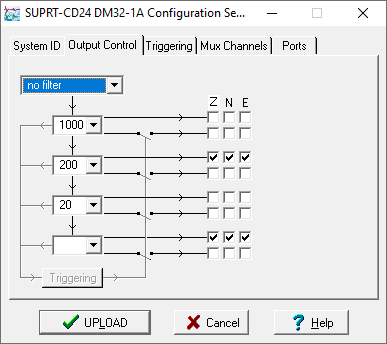
The terminal window will close. If you now revisit the
tab of the
Configure dialogue, the menu should be restored,
as shown below:
Upgrade instructions
-
In Scream!’s main window, right-click on the instrument’s icon and
select from the pop-up menu.
(If this fails, connect the instrument directly to a serial port and
right-click on the serial port instead.)
-
Check that there is two-way communication with the digitiser by pressing
enter. The instrument should reply with
ok on a new line.
-
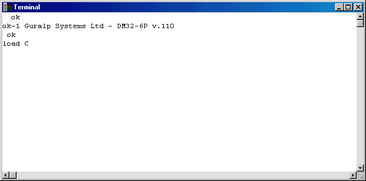
Type ok-1 to enable advanced commands. The
instrument will reply with a message describing the current firmware
version.
-
If the firmware needs updating, type load and press
enter. The instrument will display
load C. The instrument will now wait 10 seconds for you
to provide a firmware file.
-
Right-click on the terminal window and select
:
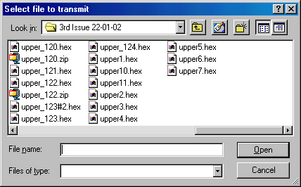
Navigate through the directories on your computer to find the firmware
file, select it, and click .
-
If the file opens successfully, Scream! will show the progress of the
upload:
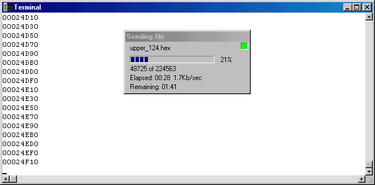
Depending on the speed of the link, it may take up to 20 minutes to
transfer the firmware.
-
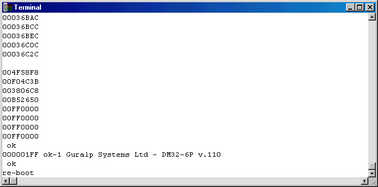
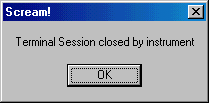
When the transfer completes, type re-boot
to restart the 6TD.
-
At this point you may want to switch the 6TD off and then back on, to
ensure that it restarts properly.
-
Allow 30 seconds for the instrument to restart, then open another
terminal window. Type ok-1. The 6TD will
reply with a message containing the new firmware version number. If
this is correct, you have successfully updated the firmware. Close the
terminal window to resume data transmission.
Change Log
- v.328, 2017-07-24
This release addresses a number of disk-related bugs and performance issues.
- If the storage was filled in write-once mode, the CD24 became
unresponsive and then performed repeated reboots without any serial output.
It could not be reset without being opened for a hardware-jumper-reset or a
re-flash. A temporary resolution could be effected by using the FILESAVE command to reset the memory pointers, but the
problem would reoccur when the storage was next full. This is now resolved:
the CD24 continues to be responsive after the storage is filled.
- The WRITE-ONCE transmission mode should change automatically to DIRECT
when the storage becomes full, but this was not happening. This is now
resolved: the digitiser behaves correctly when the memory is filled.
- The FLUSH command was too slow, taking 110
minutes to complete a 16 GB flush - approximately 2.3 MB/s.
Firmware versions v.314 and earlier were faster, achieving ~7.6 MB/s.
This is now resolved: A compromise allows the rate to be recovered to
5.5MB/s, (i.e 50 minutes for 16 GB), while still working with both
older and newer disk types.
- A FLUSH operation when using new (SATA) disks,
identified by the lack of an external heater socket, gave many write-queue
error messages, displayed as "Qerr". These are emitted when the FireWire bus
is reset and, cumulatively, added tens of minutes to a flush on top of the
already decreased transfer rate. This is now resolved: The Qerr message will
still occasionally be printed, but the frequency has been reduced as much as
possible. For example, around two such errors may now occur during a
16 GB transfer, causing a delay of around ten seconds.
- v.326c, 2015-12-04
This release adds support for uBlox v1.08 firmware
- Added support for 2dp or 3dp in the ZDA seconds field - needed for
uBlox v1.08 firmware compatibility.
- v.326, 2015-08-21
This release adds support for uBlox GPS receivers:
- Added support for uBlox NMEA sentence $PGSLS sentence to set the
"leapsecond" variable.
- Parse latitude and longitude from five-decimal-place values (from
uBlox) properly.
- v.323, 2014-06-23
- Added support for 4GB memory modules
- Improvements to step and broadband noise calibration
- Default Baud rate now 115,200
- v.321, 2013-10-15
-
- Adds support for newer memory modules (superseded by 323)
- v.320, 2013-05-23
-
- Minor change to powering the FireWire disk
- v.319, 2013-05-23
-
- Improves behaviour when automatically flushing data to disk through a
FireWire hub.
- Supports 800 samples/second output.
- v.317, 2013-04-15
-
- Adds support for newer FireWire drives.
- v.316, 2012-11-27
-
- Fixes a bug which caused occasional extra characters in serial transmissions when RTstatus was enabled.
- v.315, 2012-06-27
-
- Resets the GPS a few seconds after boot-up. This resolves a timing problem that only affected low-latency, rack-mounted CD24 digitisers with built-in EAMs.
- v.314, 2012-05-04
-
- Resolved a problem where the unit would sometimes reboot while awaiting a firmware or InfoBlock upload. NB: please be sure to use “LOAD” for firmware and “LOAD-I” for info blocks.
- Resolved a problem where the configuration could become corrupted. This would often manifest as incorrect system or stream IDs.
- v.310, 2012-01-05
-
- Added support for newer memory architectures.
- v.309, 2011-06-01
-
- Added – Temperature reporting to status stream every 10 minutes, to match DM24 Mk3.
- v.305, 2011-04-20
-
- Fixed – Stream names for triggered data were not compatible with DM24 equivalents.
- Fixed – A problem that could prevent the DOWNLOAD command from working when in certain transmission modes.
- Fixed – 5T can now be selected as a sensor type.
- Fixed – Erroneous reporting of tap speeds at boot when higher rates used.
- Added – 230,400 baud support.
- Added – Level triggering and high-pass filtering, compatible with the DM24.
- Added – A new, low-latency mode.
- v.290, 2009-12-08
-
- Fixed – Triggered data was not always stored to FLASH when in DUPLICATE mode.
- Fixed – Triggered data was not always completely stored to FLASH when in dual mode – some post-trigger data could be lost.
- Fixed – Trigger messages caused status to be flushed. Flushing now only occurs at the end of the trigger, not after each message.
- Fixed – Disk power was not turned on by the
RESET-DISC command.
- v.289, 2009-11-06
-
- v.287, 2009-06-17
-
- Fixed – Download command fails to function correctly resulting in little or no data. Work around is to use FireWire port for data extraction.
- v.286, 2009-04-08
-
- Fixed – Terminal window closes when doing flush on 16G units. Timeout issue. Flush still completes.
- Fixed – Write once mode Show-Flash has negative value in free memory location. Display fault only.
- Fixed – Write-once mode when flash is full: a flush results in an endless loop.
- Fixed – Oldest data in show-flash is wrong: both ID and Date+Time are incorrect after the flash has been erased.
- v.285, 2009-03-20
-
- Fixed – watchdog reset problem.
- v.283, 2008-06-08
-
- Fixed: large flash chip erase.
- Fixed: time stamp of PWM status lines.
- v.282, 2008-05-28
-
- Fixed: Showflash message doesn’t indicate how much flash is free. Also it should show times and not chip position. Also better indication of GPS status required rather than raw NMEA message.
- Fixed: GPS on power cycle exhibits unstable behaviour. Offset oscillates between GPS on times.
- Fixed: GPS power cycle message in status is incorrect (this is only a display issue and does not affect actual operation).
- Fixed: When using Lock/Unlock/Centre mass position continues to be output after ‘go’.
- Fixed: GPS status messages needs to be improved. Current messages are not human readable and should be interpreted and output to status stream.
- Fixed: Boot up system status should have config details. Details of the system should be included. Baud rate, Taps, Triggering etc.
- Fixed: Flash download fails with Qerr when there is more than 1 day of data.
- Added: support for flush button and status LED (hardware dependent).
- Added: time to autocentre status.
- Added: power control for FireWire power and auto-flush functionality (hardware dependent).
- Added: time stamp on status lines.
- v.280, 2008-03-28
-
- Set-clock fixed.
- Buffer overrun fixed.
- v.279, 2008-02-20
-
- FireWire arbitration.
- Flash status persistence.
- Added time sync packet output.
- Re-arranged enable flags for Ethernet enable + others to be compatible with DM24 layout
- v.278, 2007-10-23
-
.info command now included.%autocentre now controls the autocentre correctly, and will report the current configuration.
- v.277, 2007-10-02
-
- ADS1216/17 chip detection on re-boot autodetect is unreliable. Solution is to manually select chip. Uses CMOS to keep configuration. It initialises to operate with a ADS1216. If a 1217 is fitted the command
AD17 enable is used to switch operation to the ADS1217. .AD17 reports current setting (enabled/disabled). Fault can be identified as a doubling in gain of the mass position and calibration signal inputs.
For more information, first contact your
local distributor
or email .
![]() - not the Local or the
Comxx icons)
in Scream!’s main window and select
from the pop-up menu. This will open the
Configuration setup window. The version number is
given in the Software revision box.
- not the Local or the
Comxx icons)
in Scream!’s main window and select
from the pop-up menu. This will open the
Configuration setup window. The version number is
given in the Software revision box.


