Contents
Affinity password reset procedure
This reset procedure can be useful if the root password has been forgotten. If
this procedure is not able to reset the password on your unit, then the unit
must be returned to Güralp Systems for re-flash. Please contact
for details and to arrange an
RMA
Return Material Authorisation.
An RMA is permission to return goods for any reason. Our Goods-In team may
refuse to accept any item received without an RMA number clearly
marked on the outer packaging so, please, always ensure that you have an
RMA before despatching anything to us. For more details, please see our
Warranty and Repairs policy.

This procedure applies to Affinity digitisers only.
Preparation
Equipment required:
- A GPIO/Console cable (12-way military-specification bayonet to DE9,
part number CAS-DCM-0036)
- A laptop or PC with either a serial port or a
USB-to-RS232 adaptor.
- A copy of Scream (see
the Scream download page
if you do not already have this).
Physical access to the unit will be required.
Preparing scream.ini
The procedure requires some text to be entered very quickly. The simplest
way to achieve this is to program the function keys in Scream's in-built
terminal emulator to generate the strings required. To do this, open
Scream and select .
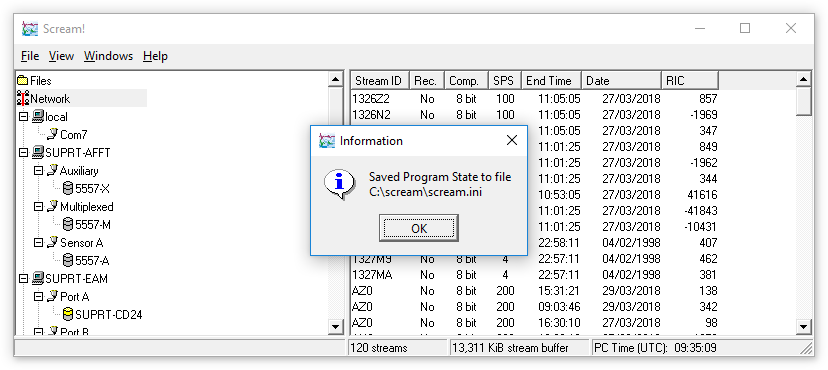
Note the location of the scream.ini file, as shown in
the resulting dialogue box:
Close Scream and then open scream.ini in your
favourite text editor. (Güralp recommend
Notepad++Notepad++ is a free (both as in “free speech” and
also as in “free beer”) and highly-recommended text-editor, source-code
editor and Notepad replacement that supports
several languages. It can be downloaded from
The Notepad++ web site..)
Locate the section marked [SoftKeys]. If you have
never used Scream's programmable function keys, the entries in this section
will all have null right-hand sides. If this is not the case, copy the
current values to a back-up file and then change the first three key entries
to read:
[SoftKeys]
F2=fishsoup
F3=setenv bootargs "quiet service"
F4=run nor_boot
⋮
Save the file
Identifying the COM port
If your PC/laptop has a serial port, it should be labelled as COM1
or COM2. If you are using a USB-to-serial adaptor, you need to
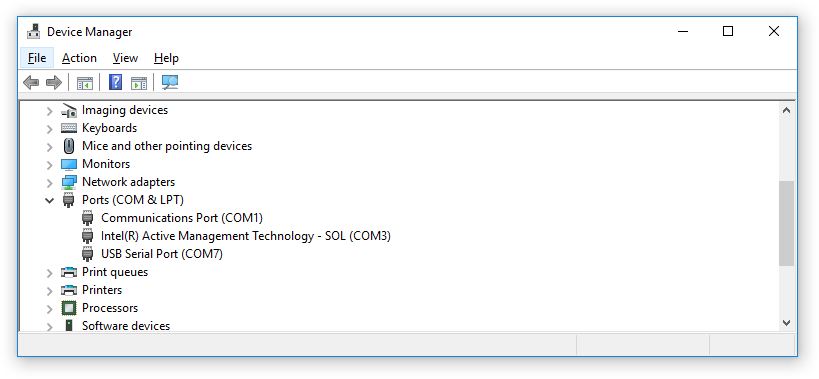
identify which COM port is allocated to it. To to this, open Windows Device Manager,
scroll down to the "Ports (COM and LPT)" sub-tree and click the
right-arrow next to it
( )
to open and expand the sub-tree. Plug in the USB-to-serial adaptor: within a
second or so, you should see an extra item appear. Note the COM port number
allocated to this new entry. In the example below, it is
COM7 (labelled USB Serial Port (COM7)".
Configuring the emulator
If you are using a USB-to-serial adaptor, ensure that it is plugged in.
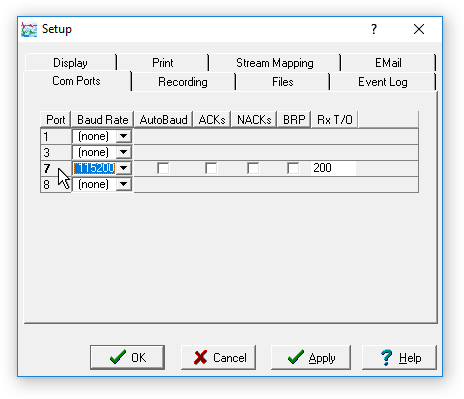
Open Scream and select from the
main menu. Select the "Com Ports" tab of the dialogue. Locate the entry
corresponding to the connection to your Affinity, set the Baud rate to 115,200
and clear all the check-boxes, as shown:
Now double-click the number at the left-hand end of the relevant row. Scream's
Terminal Emulator window will open.
Booting
Apply power to the Affinity. Around 15 lines of output will appear almost
immediately, ending with the line "Enter enable string to access
bootloader".
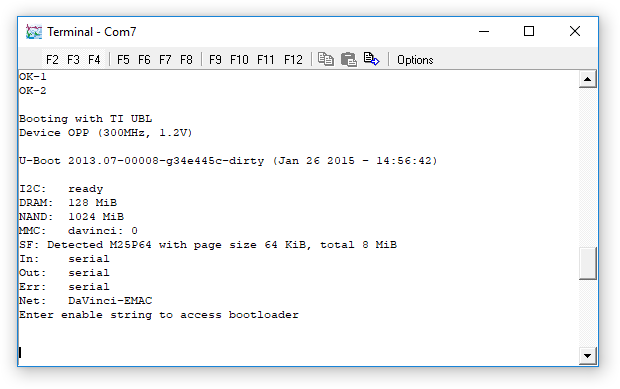
As soon as you see this, key f2. This will
automatically type the correct "enable string", although it will not be echoed
to the screen.
Wait half a second and then key f3. Wait
another half second and then key f4. These two
keystrokes send commands which configure the boot-loader and then instruct the
Affinity to boot in service mode.
The Affinity will generate some output as it boots, ending with:
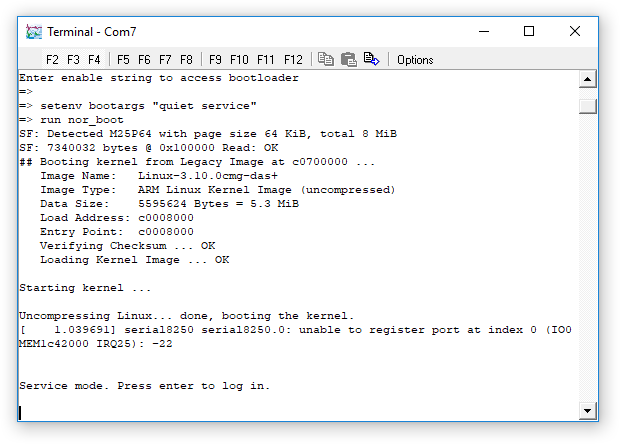
Immediately key enter and the system will print
the service prompt:
service / #
If you do not see this output, power-cycle the Affinity and
try again. The most common problem is not reacting quickly enough to the
prompts.
Changing the root password for logins
It is not generally possible to recover the root password,
but it can be set back to the factory default,
and then, after logging in with this password, changed again to something
secure. To do this, enter the following commands:
ubiattach /dev/ubi_ctrl -m 1
mount -t ubifs /dev/ubi0_0 /mnt
cd /mnt/etc
cp shadow shadow.bak.local
sed -i shadow -e '/^root:/s/.*/root:$1$SHR2tXKJ$9GLrxQtEihf3NksjV82Nj\/:14666:0:99999:7:::/'
cd lighttpd
cp htdigest.local htdigest.bak.local
sed -i htdigest.local -e '/^root:/s/.*/root:Platinum web authentication:9bba7155c66fbd2740339df96f507ebd/'
cd /
umount /mnt
These commands must be entered exactly or
your Affinity may become unusable. We recommend that you use copy-and-paste
rather than trying to transcribe them manually.
Power-cycle the Affinity and allow it to boot normally. It should now be
possible to log in, using either the web interface or the command line, using
the user-name root
and password .
Once logged in, using either the web interface or the command line, change the
root password to something secure. From the web interface, visit
from the
menu.
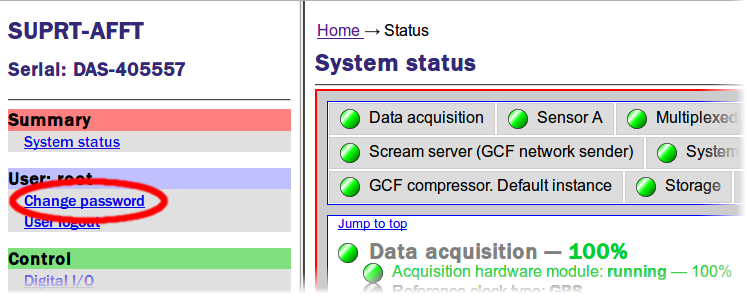
If you prefer the command line, use the command passwd
and follow the prompts.
Do not connect the unit to the Internet without first
changing the root password. Strong passwords are essential for
Internet-connected systems.
 For NAM MkⅡs, please see the
NAM Mk2 password reset procedure
 For legacy NAMs and NAM64s, please see the
legacy NAM and NAM64 password reset procedure
 )
to open and expand the sub-tree. Plug in the USB-to-serial adaptor: within a
second or so, you should see an extra item appear. Note the COM port number
allocated to this new entry. In the example below, it is


