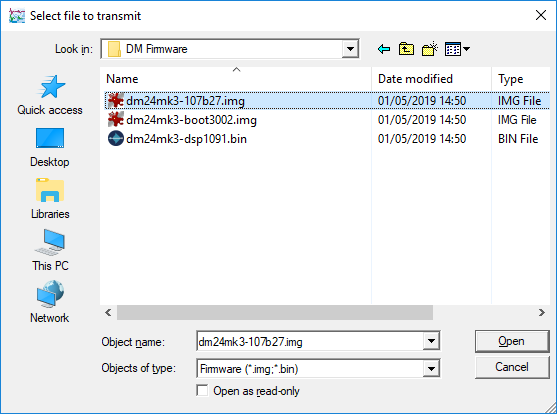
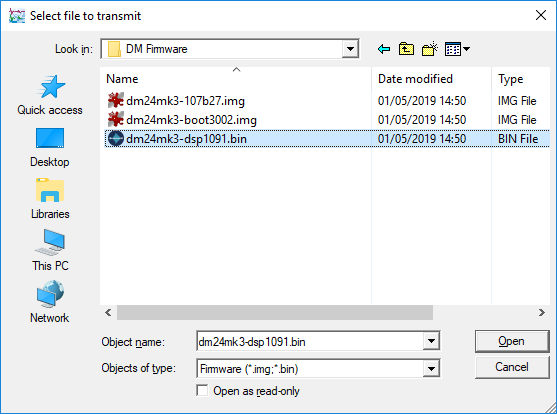
Firmware for the Güralp DM24 Mk3
Güralp DM24 digitisers manufactured after 2005 are of the Mk3 type.
Firmware for these modules has a version number above v.100.
The digitiser has three firmware components, which can be updated
separately: the main system program, the DSP code and the boot loader. The .zip
files on this page each contain all three of these files. If the bootloader in
use is not the latest version for the required firmware (i.e. bootloader 3.02
for v.107 firmware and bootloader 130 for v.103 firmware), it should be
upgraded first.
To find out what firmware version you are currently using, right-click on
the digitiser's icon (not the Local or the
Comxx icons) in Scream!’s
main window and select from the pop-up
menu. This will open the Configuration setup window. The version
number is given in the Software revision box.
V.106 firmware has been deprecated because it does not
support the latest Güralp GPS receivers. It will no longer be maintained.
All users running v.106 are advised to upgrade to the latest v.107 build. This
requires the latest v.3 boot-loader and, if you change the
boot-loader, you need to reload the system code and DSP code. This means
that a complete upgrade of all firmware components, starting with the
boot-loader, is required.
If you are upgrading from
either
- any v.106 build below 42; or
- any v.103 build
it is necessary to run a command in order to reset certain system timing
parameters. Failure to do this can compromise the accuracy of data
time-stamps. After the upgrade is complete, allow the system to boot
normally and then copy and paste the command below to the command-line of
the digitiser, and then reboot the unit. This command sets a number of
values in the non-volatile configuration memory and only needs to be
executed once per system.
-
For units without a programmable (variable) gain amplifier:
ok-1 0 [pwm] ! [pwm] nv! 59920 bias ! bias nv!
$06010F dspsync ! dspsync nv!
-
For units with a programmable (variable) gain amplifier:
ok-1 0 [pwm] ! [pwm] nv! 50920 bias ! bias nv!
$06010F dspsync ! dspsync nv!
Firmware for units without USB support
This firmware should also be used for all instruments and data acquisition
systems with embedded DM24 digitisers.
Download the latest v.107 DM24 Mk3 firmware, a 276K
.zip file including:
- system program v.107 build 29
- boot loader v.30 build 02
- DSP code v.10 build 91
Latest firmware for units with USB support
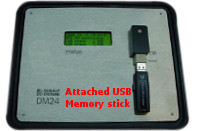
DM24s with USB support have a type A USB socket under the lid, as shown
in the illustration to the right. These units need different firmware to
all other DM24s:
Download the latest v.103 DM24 Mk3 firmware, a 181K
.zip file including:
- system program v.103 build 82
- boot loader v.1 build 30
- DSP code v.10 build 71
Earlier versions
Earlier versions of the DM24 Mk3 firmware, for testing or reference, may be
downloaded from:
the DM24 Mk3 download directory.
Upgrade instructions
There are two ways to upgrade a DM24: automatic and manual. You should use the
automatic method if you are upgrading any of the following:
- the DM24 digitiser embedded in a *TDE instrument (a 3TDE, a 40TDE or a 5TDE)
- the DM24 digitiser embedded in a DM24S3EAM, a DM24S6EAM, a DAS-S3 or a DAS-S6
- a standalone DM24 which you can connect serially to an EAM
- a DM24 embedded in a *TD instrument which you can connect serially to an EAM
If you are upgrading one of the systems listed above, follow the instructions
under "Automatic Upgrades", below.
Only if you do not have access to an EAM and wish to upgrade a stand-alone DM24
or a DM24 embedded in a *TD instrument, please skip to
"Upgrading without an EAM".
Automatic Upgrades
If you have an EAM or a system which contains an EAM, the EAM can be used to
automate firmware upgrades of attached or integrated digitisers. This is the
easiest and safest way to upgrade a DM24.
You should also use this method if you have a DM24SxEAM, a
DAS-Sx, a 3TDE, a 40TDE or a 5TDE instrument.
The latest version of Platinum software always includes the latest DM24
firmware so, first, ensure that your EAM's firmware is up-to-date - see
the release
notes for Platinum firmware for details. Connect your DM24 to the EAM if
necessary and then, from the web interface, visit the configuration page for
the digitiser. If an upgrade is available, this page will notify you and a
check-box near the bottom of the page will allow you to upgrade the firmware on
the DM24 when the page is submitted.
If you prefer to use the EAM's command line, please see
section
8.2.3 of the Platinum manual for details of the
dm24-upgrade command-line tool.
Upgrading without an EAM
Loading firmware takes place in the bootloader environment,
which does not properly support 230,400 Baud operation. There have also been
rare reports of upgrades failing at other, high Baud rates. If Port 0 is set
to a line speed higher than 38,400 Baud, we recommend reducing the line speed
to at most 38,400 Baud before proceeding. Both ends of the serial link need to
run at the same speed so you may also have to reconfigure Scream or your
terminal emulator. The line speed can be safely reset to the original rate
after the upgrade.
You can update the digitiser firmware using any terminal program which
supports the X-modem protocol, such as minicom (for
Linux users), ExtraPuTTY
(www.extraputty.com)
or Scream!.
To install this firmware using Scream!:
Right-click on the digitiser’s icon
( ) in the main window
and select from the pop-up menu:
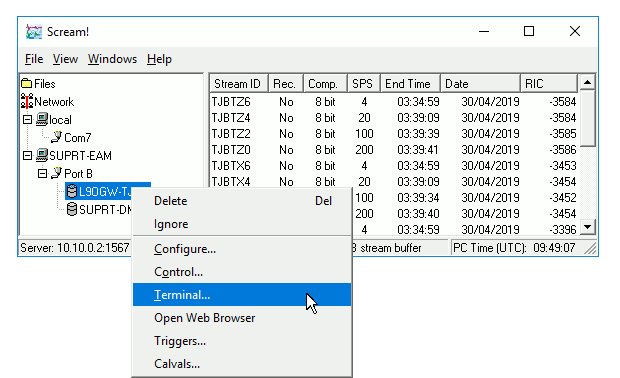
A terminal window should open. Check that there is two-way
communication with the digitiser by pressing
enter. The digitiser should reply with
ok on a new line.
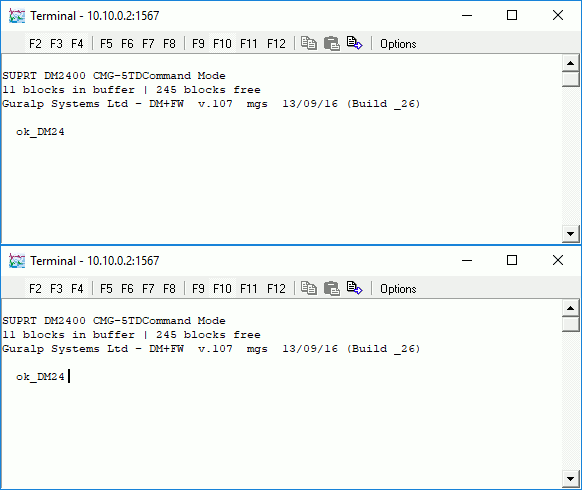
Type re-boot to reinitialise the digitiser,
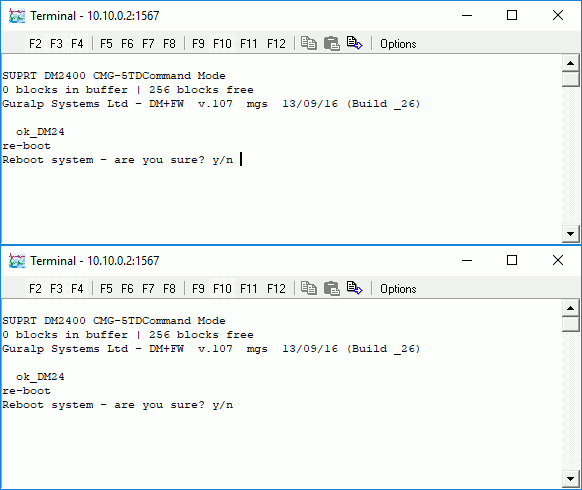
and confirm with y.
As it is restarting, the digitiser will report its status over the
terminal connection, followed by a maintenance menu. (The first few
lines will scroll of the top of the screen so it is presented here
in text form.)
I/OPort =$42 : RTModule no I2C ACK @ $78
MPE ARM ANS ROM PowerForth v6.30
ARM Serial BootStrap v1.100, 11 August 2003
Copyright (c) 2002-3 GSL, EDSL & MicroProcessor Engineering Ltd.
Port 0 38400 baud Port 1 4800 baud Port 2 38400 baud
Guralp Systems Ltd - ARM-BOOT v3.0 mgs 13/12/12 (Build _02)
System Code versions loaded :-
Current 0105:0000 Guralp Systems Ltd - DM+FW v.107 mgs 13/09/16 (Build _26)
Backup 010E:0000 Guralp Systems Ltd - DM+FW v.107 mgs 13/09/16 (Build _26)
Previous 0117:0000 Guralp Systems Ltd - DM+FW v.106 mgs 11/11/14 (Build 57w)
DSP Code :
0103:0000 dsp1091.bin loaded 2016-09-29 Default
0104:0000 dsp1091.bin loaded 2016-09-29
Command keys:
C - set real time Clock (2016 9 29 14:37:06 )
I - view/upload InfoBlock
F - run the Forth monitor
S - update System program
O - select Other system program
B - update Boot program
D - update DSP code
T - Toggle default DSP code
Q - Quit maintenance system
5 seconds to auto-start
If you do not press a key in the next five seconds, the digitiser will start
up normally. If you want a little more time to read the menu, press the
space-bar and the time-out will be increased to thirty seconds.
-
Look in the boot-up messages to find the version of the boot loader
you are currently using. It will be reported in a line like this:
Guralp Systems Ltd - ARM-BOOT v3.0 mgs 13/12/12 (Build _02)
In this example, the current boot loader is version 3.0, build 2.
If the boot loader in the firmware package is newer than the version you
currently have installed, you will need to update it first. Press
b at the maintenance menu to do this.
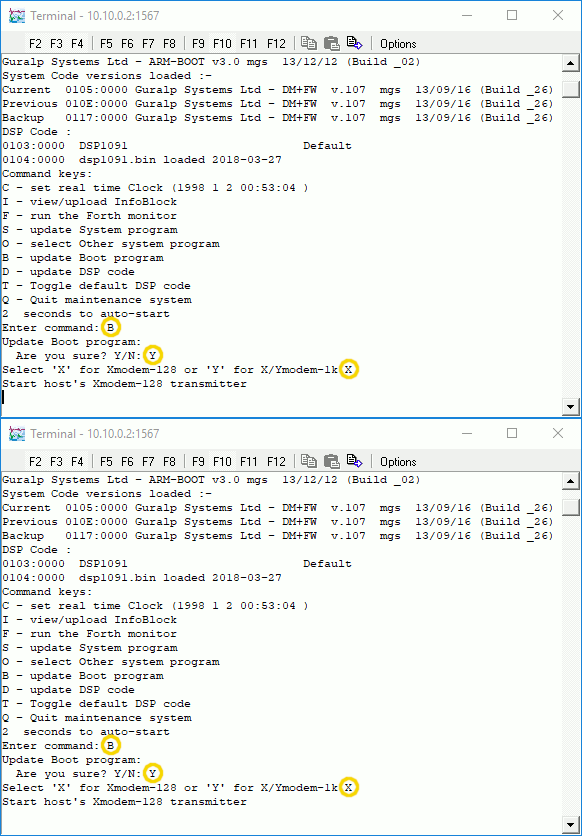
You will be asked for confirmation: press Y
to proceed. You will then be asked to select a file transfer protocol. Press
X to specify the X-modem protocol.
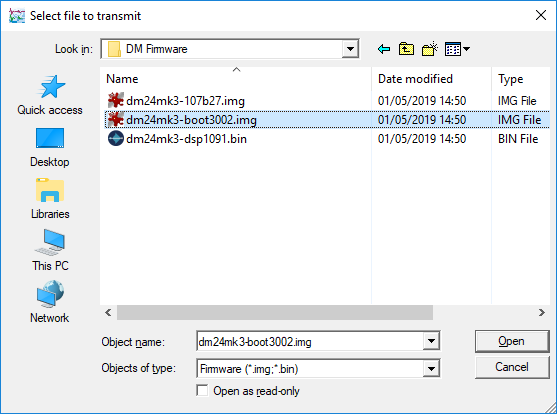
The digitiser will then request an X-modem file transfer.
Whilst the file is loading, a progress window will be displayed.
Depending on the speed of the link, it may take several minutes to transfer
the bootloader.
When the transfer is finished, you will be asked
if you want to
Reboot to run NEW BootLoader Y/N?
It is essential to respond with a y
before proceeding to the next session. Failure to do so may cause
your system to become unusable.
Once the system has rebooted, the maintenance menu will appear
again. If you do not press a key within five seconds, the digitiser
will start up normally. You do not want it to do that so press the
space-bar: the time-out will be increased to thirty seconds, allowing
you time to read the next instructions.
-
The next step is to update the system program.
It is essential to ensure that the boot loader is
up to date before proceeding with upgrading the system program. If
in any doubt, please contact
for advice before continuing.
To update the system program, press s at the
maintenance menu. The digitiser will display the message
Updating Application and then prompt you for your choice of
file transfer protocol. Press X
to specify the X-modem protocol.
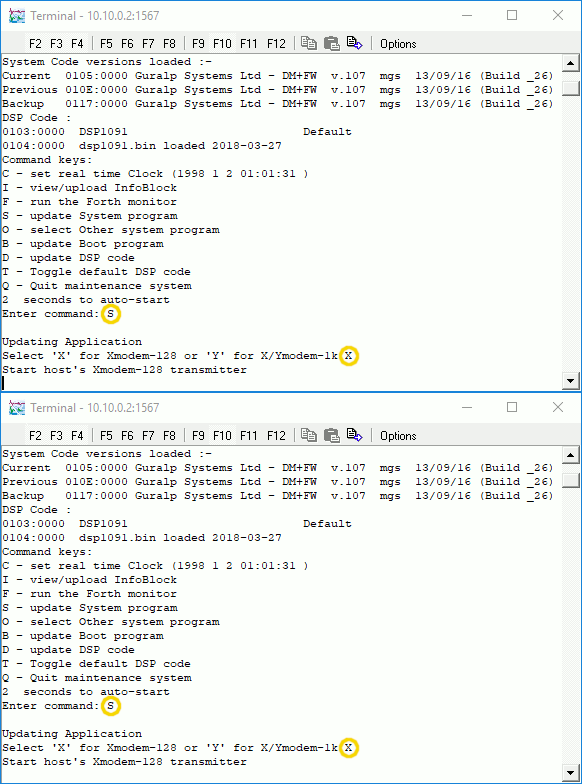
The digitiser will then request an X-modem file transfer.
Whilst the file is loading, a progress window will be displayed. Depending on the
speed of the link, it may take up to twenty minutes to transfer the system code.
Once the file is fully transferred, the digitiser will return to the maintenance menu.
-
The next step is to update the DSP code.
It is essential to ensure that the boot loader and
system program are both up to date before proceeding with upgrading
the DSP code. If in any doubt, please contact
for advice before continuing.
Look in the boot-up messages to find the version of the DSP code you are
currently using.
DSP Code :
0103:0000 dsp1091.bin loaded 2016-09-29 Default
0104:0000 dsp1081.bin loaded 2016-03-16
There are two slots available for DSP code. In this example, the version
in use is dsp1091.bin, i.e. version 1.091.
If the DSP code in the firmware package is newer than the version you currently
have installed, you will need to update it. Press D
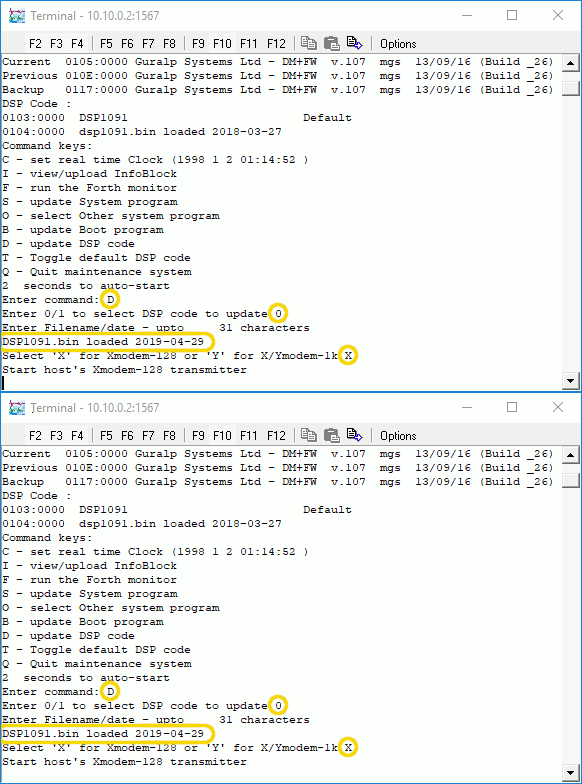
at the maintenance menu to do this. The digitiser will reply with
Enter 0/1 to select DSP code to update
Press <0 or 1
to specify which of the two DSP code slots you want to overwrite, and
then press enter. The default is slot 0.
This is the recommended slot to use unless you are performing
diagnostic comparisons. The digitiser will then prompt:
Enter Filename/date – upto 31 characters
You can enter a descriptive string for the particular DSP code here.
The digitiser will print this string at every boot-up, to remind you
which version of the DSP code you are using. It is advisable to include
the version number and the upload date. If you leave this blank, the
original file-name will be used.
You will then be asked for your choice of file transfer protocol. Press
X to specify the X-modem protocol.
-
The digitiser will then request an X-modem file transfer.
Whilst the file is loading, a progress window will be displayed. Depending on the
speed of the link, it may take up to three minutes to transfer the DSP code.
-
When the upload is complete, the digitiser will reprint the
maintenance menu. Press the enter key
(without selecting a menu option) and the digitiser will respond
with
Invalid command - Starting System
and then proceed to boot up using the updated firmware. Exit your
terminal emulator in the normal way; In Scream!, you only need to
close the emulator window.
Release Notes
- 2019-07-16 : v.107 build 29 + DSP v10.91 + Boot-loader 30.02
This release contains a customer-specific modification. There is no general need to upgrade to this version.
- Made configuration options for PPS jitter rejection non-volatile.
- 2019-07-16 : v.107 build 28 + DSP v10.91 + Boot-loader 30.02
This release contains a customer-specific modification. There is no general need to upgrade to this version.
- Added configuration options for MUX ADC clock.
- 2019-05-03 : v.107 build 27 + DSP v10.91 + Boot-loader 30.02
This is now the recommended release for all Mk3 DM24s except for those with USB support, for which the latest v.103 build should still be used.
- 2016-09-13 : v.107 build 26 + DSP v10.91 + Boot-loader 30.02
-
- Fixed a bug which affected scheduled generation of broadband noise calibration signals. (It did not affect manually-invoked calibration operations.)
- 2016-04-21 : v.107 build 25 + DSP v10.91 + Boot-loader 30.02
-
- Reduced an amplitude-dependent DC offset in the broadband noise calibration signal. Added calibration details in "Start of Calibration" status.
- 2015-11-02 : v.107 build 24 + DSP v10.91 + Boot-loader 30.02
Version 107 overcomes a firmware size limitation inherent in v.106. It requires a version 3 boot-loader, which must be installed before the system code. This build contains all of the v.106 b57x functionality plus:
- Support for variable gain on multiplexed inputs on suitable hardware
- Added support for uBlox PGSxx messages - automatic leapsecond update
- Fixed reporting of ms-gap value in $cmos output for values greater than 255
- 2015-02-24 : v.106 build 57x + DSP v10.90
- An extra reset is required to initialise the Micron flash.
- 2014-11-11 : v.106 build 57w + DSP v10.90
- Support for Micron MT29 series NAND flash.
- 2014-10-08 : v.106 build 57v + DSP v10.90
-
- Restore handling of GPRMC gps sentence for old Garmin gps units.
- 2014-04-24 : v.106 build 57u + DSP v10.90
-
- Updated LCD code for DIP203 unit (initialisation timing/sequence issue).
- 2014-04-14 : v.106 build 57s + DSP v10.90
-
- This release fixes a bug in the GPS power-cycling code which could power-off the GPS receiver for extended periods.
- 2012-05-03 : v.106 build 57d + DSP v10.90
- This release properly fixes the “bin5″ problem, which caused occasional data corruption. It requires DSP v10.90 for correct SI mode operation.
- 2011-11-10 : v.106 build 57b + DSP v10.89
-
- Adds RAW selection for causal filter – DSP v10.88 addressed causal time-stamping
- Fixes erratic behaviour of calibration commands when terminating one already in progress
- Fixes component (z, n/s, e/w & all) commands in Borehole/OBS SoH modes
- Fixes DSP bootloading to cope with corrupt slot value
- Adds ‘raw’ tap parameter to causal command to allow use with 2kHz input data – o/p at 1000,500 or 400sps
- Fixes problem with SI mode which caused occasional data corruption
- 2011-09-28 : v.106 build 56f + DSP v10.87
-
- Adds support for ‘Causal Filters’ – requires DSP v10.87
- Removes testdac option on I2C error
- The system now automatically assigns a ‘cal’ stream if no others are selected – a situation which previously caused a crash
- Removes erroneous ‘terminating’ message when starting ‘cal’ operations
- Added causal and channels commands
- Adds filtering for the clock offset figure in Unified Status Packets
- Adds PGAalarm to Spectral Intensity mode
- Adds various custom commands for Moglie OBS using network
- Adds two new commands (from b55r):
- backupfram saves the current configuration in system flash ROM – this will then be
AUTOMATICALLY reloaded after a trashfram operation
- restorefram can also be used to revert to the backed up configuration
- 2011-07-01 : v.106 build 55m + DSP v10.86 + Build 11 of the v2 bootloader
-
- Fixes a problem where the ‘C’ stream (calibration return) sometimes appeared as ‘X’
- Fixes a problem where using only very low sample rates (1sps) could trigger reboots via the watchdog timer
- Adds support for other GPS receivers (e.g. GLONASS) which require higher Baud rate. This is specified as gps-type 4 and requires use of the 1 xxxx baud command to configure Port1 to the correct speed. The system will automatically report a problem if NMEA is not detected.
- Improves system performance regarding interrupt response and timing control
- Fixes a possible problem of spurious resynchronisation on GPS power cycle
- Fixes setid and resetlabels to correctly restore default Z,N,E,X labelling
- Adds n StrongMotion command to address lowlatency/SI configuration issues. The command takes a single numeric parameter ; 0 for off, 1 for a three-component system, 2 for two three-component systems.
- Removes incompatibilities between original SoH and ModularSoh
- Adds ‘BytePipe’ mode for packeting arbitrary data stream into GCF format
- Enhances temperature compensation
- Includes updated SNTP for Mogli clock setting
- 2010-05-26 : Build 9 of the v2 bootloader
-
- Adds support for newer Flash memory chips.
- 2010-05-24 : v.106 build 46
-
- Provides fixes for unified status reporting of the clock difference flag (the algorithm now uses a fixed drift rate of 0.07µs/s when the clock is unlocked).
- The GPS NMEA parser now understands $GPGSL sentences from a Guralp central timing facility (RTM), and correctly passes through information about the RTM’s GPS fix and drift to the DM24.
- Fixes a problem which affected the broadband calibration facility (. RANDOMCAL).
- 2010-02-16 : Build 7 of the v2 bootloader
-
- Fixed a problem which could occur during an update from v1 Boot when a new system fails to load correctly: the session will now stay at the boot menu until a valid system code update occurs.
- 2010-02-01 : v.106 build 42
- This release was recommended for all Mk3 DM24s other than those with USB support, for which the latest v.103 build should still be used.
- Adds support for 6/7 channel system with variable gain input stage.
- Added short mux channel blocks for CD1.1 – 10 secsmux.
- Added flush-flash command to ‘empty’ flash file. Use in preference to reset-flash: flush-flash simply sets the read pointer equal to the write pointer so the buffer is ‘empty’ – the data are still available until it is overwritten by wrapping round and the system continues to write from the current position.reset-flash resets the pointers back to the start so the old data gets overwritten straight away. The system uses the early part of the buffer more which is to be avoided in terms of durability (wear levelling).
- Bug fixes :
- %auto-centre rounding problem fixed
- Improved handling for non-standard Baud rates
- Scream TCP now reports version 4.5
- .info command restored
- Y/N handling of control chars
- FireWire updated to handle full FAT size – 511 entries (as v103b70)
- TCP/IP MSS issue fixed
- 2010-01-12 : v.103 build 82
-
- 2009-05-13 : v.103 build 78
-
- Adds USB host support for memory sticks and improved trigger selection.
- 2008-06-30 : v.103 build 70
-
- 2008-05-23 : v.103 build 68
- Fixes ADC sync problem, for both doesn’t stop and doesn’t start on GPS sync (fixes problem where timing could be 1 second out without any indication in status). Added support to switch between unified status and CD status. Defaults to CD status; use uspmonitor to re-enable unified status packets.
- 2008-02-13 : v.103 build 65
- Addresses problem with undetermined SOH control line selection during startup. Initialises cal relay twice. Addresses issue of erroneous X channel selection. ADC sync failure does not re-boot, but instead forces another sync sequence. Fixed power switching of borehole SOH I2C. Added SetTriggerLevels (protected) for real-units setup of level triggering.
- 2007-12-18 : v.103 build 64
- Updated firewire operation to allow multiple DMs to access a single disk on the same FireWire bus. Increased watchdog timeout. Flash bad block scan limited to 250 max.
- 2007-10-30 : v.103 build 62
- Modified default modem init string (removed &H0 part). Remove spurious characters during setmodem$ command interaction.
- 2007-10-26 : v.103 build 61
- Modem code now has configurable modem initialisation (command setmodem$). +modem supports option for ‘dial-in only’ mode.
- 2007-10-17 : v.103 build 60
- Fixed bug in modem code.
- 2007-10-16 : v.103 build 59
- Provides full SI (spectral intensity) functionality with DSP v.1060.
- 2007-09-19 : v.103 build 50
- Sync test checks for ADCs that don’t stop/start on sync, fixes timing error where data <e;1 second out.
- 2007-07-16 : v.103 build 49
- Support for 512Mb (4Gbit) NAND flash.
- 2007-07-12 : v.103 build 48
- Force re-boot if failure to ‘sync’ detected.
- 2007-07-02 : v.103 build 47
- Antares OBSN timemark stamping and support for MEMS level sensor.
- 2007-06-26 : v.103 build 46
- Fixed issue with minimum motor speed for state of health and added “sticky” motor code.
- 2007-06-20 : v.103 build 45
- Support for ORCA rubidium clock in palce of GPS – INGV OBS.
- 2007-06-04 : v.103 build 44
- Updated borehole state of health for end of travel and baudrate with RTM.
- 2007-05-24 : v.103 build 41
- Correctly resets state of health control lines to tristate.
- 2007-05-22 : v.103 build 40
- Added error report if ADCs fail to run on GPS sync (or startup).
- 2007-05-16 : v.103 build 38
- Added ‘height’ to GPS location display. Enhanced DSS status – allows output rate to be adjusted between 5 and 60 seconds (setdssrate). Supports ‘enhanced’ BRP mode developed for IP wireless networking. System also automatically ‘files’ data that would have been lost due to transmit buffer — can be recovered by selecting adaptive mode.
- 2007-03-20 : v.103 build 32
- System sets up to run at 32MHz processor clock – problem with Cal DAC access causing timing errors.
- 2007-03-09 : v.103 build 31
- Properly fixed dsp configuration problem.
- 2007-03-08 : v.103 build 30
- Fixed problem with dsp configuration with certain sample rates and NAK handling with adaptive.
- 2007-03-01 : v.103 build 28
- Fixes problem with large flash chips on board.
- 2007-02-27 : v.103 build 27
- This and later versions require Boot1025 – larger program slots. Has full user HELP and EXPLAIN.
- 2007-02-16 : v.103 build 25
- Added serial2 and resetlabels user commands for 2 sensor systems. Also support for 2 infoblks.
- 2007-02-07 : v.103 build 24
- Removed support for ADS1217 – not compatible with ADS1216 on the DM24. Added autocal command. Fixed some compatibility issues with borehole systems.
- 2006-12-14 : v.103 build 18
- Added trap to reset xtal control to known good pwm when GPS lost (control off). Prevents large clock drift if gps lost during xtal adjustment.
- 2006-12-11 : v.103 build 17
- Improved Flash bad block handling.
Note: Units running firmware before v.103 build 10 may incorrectly mark blocks of Flash memory as “bad” and not use them. To return incorrectly-marked blocks to use, download all data from Flash memory, then issue the commands
ok-1                             select extended dictionary vocabulary
direct                           switch off flash filing mode
.badblks                         show current table
0 blkerase .                     erase table (note the "." after blkerase)
checkflash                       rescan for marked bad blocks
.badblks                         show updated table
erasefile                        to completely clear the data in flash
[seal]                           revert to 'system' commands
Now reconfigure the digitiser to record to flash using the previous filing mode.
- 2006-11-07 : v.103 build 16
- Support for new 5TD LCD display interface
- 2006-08-05 : v.103 build 11
- SETDSS command for extended status information
- 2006-08-01 : v.103 build 05
- Support for high sample rates (200 – 1000 samples/s)
- 2006-06-23 : v.102 build 74 + DSP 1.055
- LOWLATENCY mode for fast output at 20 samples/s
- 2006-06-02 : v.102 build 69
- MICRO-G command for level trigger setup
- 2006-04-19 : v.102 build 68
- COMPRESSION settings extended to allow short GCF blocks down to 20 records/block; SERIAL2 command supports dual serial numbers for 6-channel digitisers.
- 2006-04-12 : v.102 build 66
- Fixed minor issues with new Flash chip types, bad block handling and Firewire.
- 2006-03-10 : v.102 build 61
- Addressed problem where FireWire download would not necessarily transfer the complete up to date data. Added support for new Flash chip types and USB.
- 2006-02-01 : v.102 build 58
- Added support for data in on ports 1 and 2, also pass-through terminal connection; USB for data-out or console; HELP and EXPLAIN commands; DUPLICATE filing mode as 6T.
- 2006-01-16 : v.102 build 55
- LCD support. EVENTSLIST and EVENTS DOWNLOAD. Sends infoblock at boot.
- 2005-12-01 : v.102 build 52
- Fixed issue with corruption of mux channels at start up (cal relay switching)
For more information, first contact your
local distributor
or email .


 to proceed.
